Why Flushing Your Water Heater is Important
Have you ever stepped into the shower, eagerly anticipating a relaxing experience, only to be greeted by a disappointing trickle of lukewarm water? If you live in Fredericksburg, you may find this all too familiar. This region’s water is notorious for its high mineral content, which can silently wreak havoc on your hot water tank. Imagine those minerals settling at the bottom of your tank, gradually reducing the space available for hot water and cutting your showers short just when you need them the most. But it doesn’t stop there. This mineral buildup forms an insulating barrier, causing your heating element to work overtime, which not only increases your energy bills but also puts unnecessary strain on your system. Understanding the process of flushing your water heater can be a game-changer. With regular water heater maintenance, you can significantly extend the lifespan of your water heater, minimize the clatter from mineral deposits, and guarantee a steady flow of hot water to meet your household’s needs. Embrace this knowledge, and ensure that your hot showers remain a comforting part of your daily routine.
How to Drain Your Water Heater
Tools You’ll Need
- Garden hose long enough to reach a floor drain or outside
- Flathead screwdriver (for some drain valves)
- Bucket or shallow pan
- Heat-resistant gloves, safety glasses, closed-toe shoes
- Towels or rags; optional Teflon tape for the drain cap
Step-by-Step (45-60 minutes)
Follow these steps to safely drain and flush a standard tank-style water heater.
- Turn power off
- Electric: switch off the breaker.
- Gas: set the control to Pilot or Off.
- Shut off the cold-water supply
- Close the cold-water inlet valve at the top of the tank.
- Relieve pressure
- Open a nearby hot-water tap for 10 seconds to let air in and reduce pressure inside the tank.
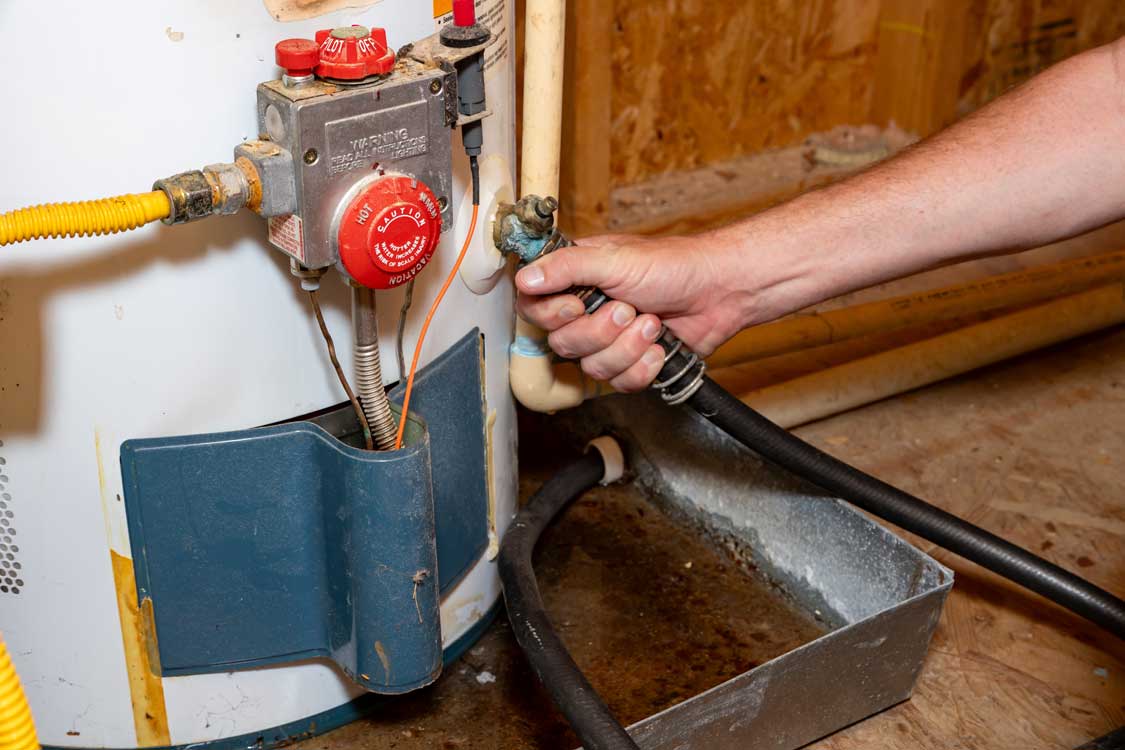
- Attach the hose
- Connect a garden hose to the drain valve near the bottom of the tank and run it to a floor drain or outside.
- Drain the tank
- Open the drain valve carefully — the water may be hot.
- Briefly lift the pressure-relief valve handle to help water flow faster.
- Flush out sediment
- When the tank is empty, close the drain valve, turn the cold-water supply on for one minute to stir up remaining sediment, then drain again until the water runs clear.
- Refill and reset
- Close the drain valve and remove the hose.
- Close the pressure-relief valve and the open hot tap.
- Open the cold-water valve to refill the tank.
- Once water flows steadily from a hot-water tap, power the unit back on or relight the pilot per your manufacturer’s instructions.
- Check for leaks
- Inspect around the drain valve and fittings. Tighten or reapply Teflon tape if needed.
If the valve clogs, leaks, or won’t seal, stop and call the licensed plumbers at 72 Degrees Texas. We can clear sediment, replace a faulty valve, and confirm your water heater’s safety. For homeowners wondering how to flush a water heater without risk, professional service is always the safest option.
How to Flush Tankless Water Heaters
Tools You’ll Need:
- 2 washing-machine hoses
- Submersible utility pump
- 5-gal bucket
- 2–4 gal white distilled vinegar (no harsh chemicals)
- Screwdriver / adjustable pliers
- Towel
Step-by-Step (about 60–75 minutes)
- Turn power OFF
- Electric: switch/breaker off.
- Gas: set to OFF and close the gas valve.
- Shut water OFF
- Close the cold inlet and hot outlet valves.
- Open a nearby hot-water faucet for 10 seconds to relieve pressure, then close it.
- Hook up the hoses
- Attach one hose from the pump to the cold-side service port (blue).
- Put the other hose on the hot-side service port (red) and route it back into the bucket.
- Place the pump in the bucket.
- Add vinegar & circulate
- Pour 2–4 gal vinegar into the bucket.
- Open both service ports.
- Plug in the pump and circulate vinegar 45–60 minutes to dissolve scale.
- Drain vinegar & rinse
- Turn off the pump. Close service ports and remove hoses.
- Open the cold inlet valve only and let fresh water run through the unit and out the hot-side service port into the bucket 5–10 minutes to flush.
- Close the port, remove the hose, and cap it.
- Clean the inlet screen/filter
- Pull the cold-water inlet screen, rinse debris, and reinstall.
- Restore & test
- Open the hot outlet and cold inlet valves fully.
- Turn gas/power ON.
- Run a hot-water tap for a few minutes and check for leaks. Clear any error codes per your manual.
Help From 72 Degrees
Since 1986, 72 Degrees Air Conditioning, Heating, and Plumbing has been your trusted partner in the Hill Country for all things heating and plumbing. Whether you’re curious about how to flush a water heater, need a quick guide on draining it, or require comprehensive maintenance for your tankless model, we’re here to provide friendly, expert help.
Want a professional to take care of it for you? Join our Care Club! It includes an annual water heater flush, priority scheduling, and proactive inspections to catch minor issues before they turn into big headaches. It’s a stress-free way to ensure your hot water is always reliable and efficient.
Need advice on draining your water heater or figuring out the best maintenance schedule for your home? Contact 72 Degrees today. We’ll ensure your system is thoroughly cleaned, expertly tested, and always ready to give you cozy comfort, no matter the season.